Your Clients can do so many things through their Online Scheduling account!
Track: Future Appointment, Service & Retail purchase history, Memberships & Packages, and Gift Cards
Update: Card on file, contact information (phone numbers, emails, address), Communication Preferences, birthday, and children accounts
Purchase: Gift Cards, Memberships, and Packages. (Only available with Integrated Card Processing)
Logging In:
The first things a client will see when arriving on your Online Scheduling page is your Business Name or Logo and Login Message
1. The Client will login or create a new account below using the "Join Now!" button (Note: There is a Password requirement of at least 8 characters including 1 number)
* If the client has already created an account, and forgot their password, they will need to click the "Reset your Password" button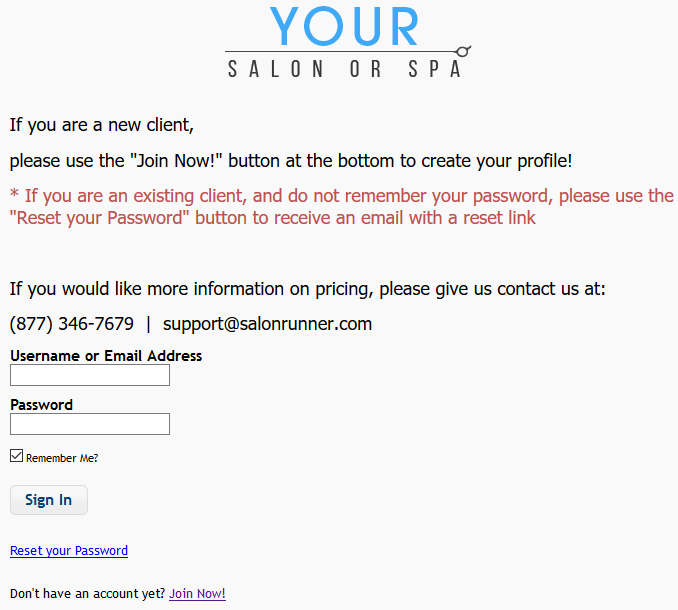
2. The only information that is required is listed in bold print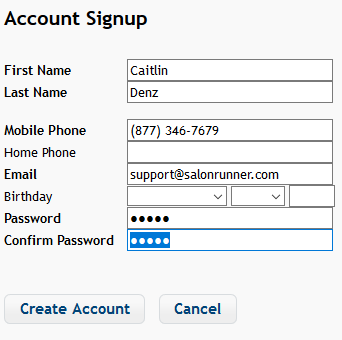
Appointments
Scheduling an Appointment:
3. Once the client is logged in, they will proceed to schedule their appointment using the "Schedule an Appointment Now!" button
- If your "Require a Credit Card Online" setting is turned on, the client will have to enter a valid card before scheduling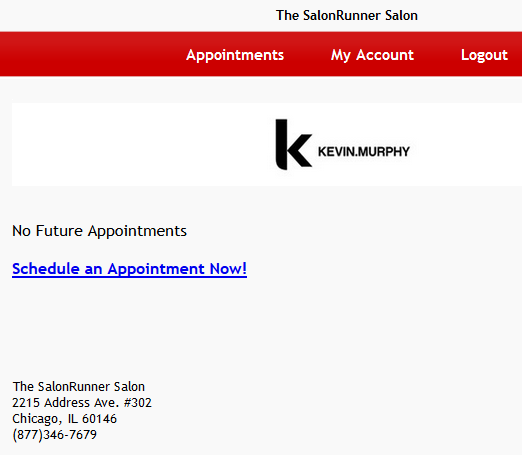
- If the client has children attached to their account, they will first use the drop-down to select who they are scheduling for: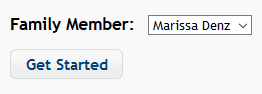
4. They will choose service(s) using the drop-downs. They can choose a specific provider for each service, or use the "Any Provider" option
- If the happen to choose a service that is set to require a secondary service, they will have to choose a secondary service from the provided drop-down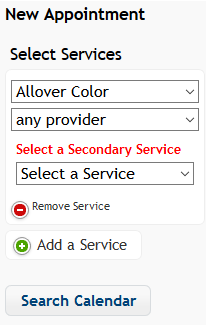
5. Once all services are selected, they will click the "Search Calendar" button
6. They can use the Time Range drop-downs or slider to adjust the availability according to their preferences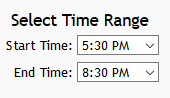
7. Next, they will select a date from the calendar below. If the date is grayed out, that day does not have any availability
8. The client will be shown ALL POSSIBLE time combinations for the day and service providers selected. They will then click "Book Now" next to the time slots they wish to take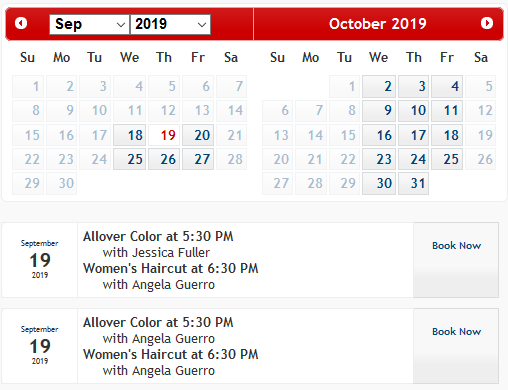
9. They will need to click "Yes" to confirm the appointment time they have just chosen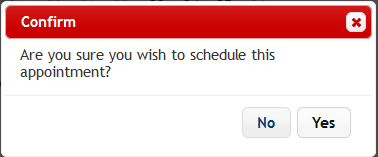
10. If you have Product Reservations turned on in your Business Settings, and have Promotions set up for the service(s) the client selected, they will be shown suggested products to reserve and/or a button to add any other Product Reservations to this appointment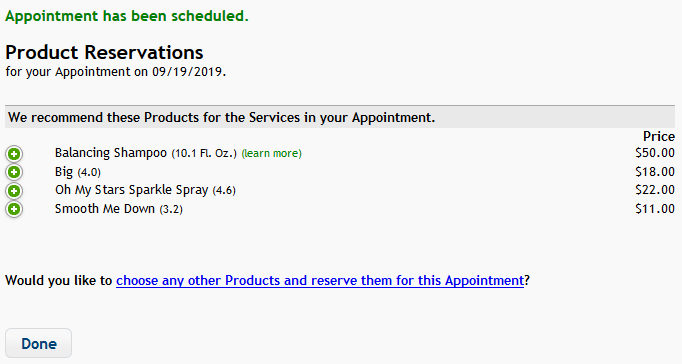
11. Once the appointment is complete, they will be shown a list of all their Future Appointments/Services. They can also find this page directly under Appointments > My Future Appointments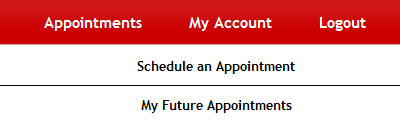
Note: They can use the ![]() icon to expand more information about this service/appointment including reserved products and an option to cancel (if you allow them to do so online)
icon to expand more information about this service/appointment including reserved products and an option to cancel (if you allow them to do so online)
- If they would like to cancel a Product Reservation, they will use the ![]() icon
icon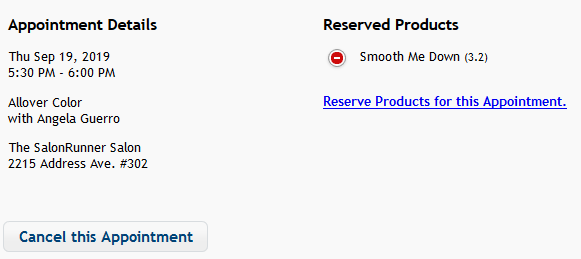
Canceling an Appointment:
12. If the client would like to cancel a future appointment/service, and you allow them to do so online, they will proceed to the "Cancel this Appointment" button
13. They have the option of entering a reason, then click "Submit Cancellation"
- If this is the required secondary service to another, they will not be able to proceed with cancellation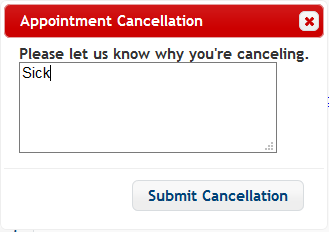
My Account
My Profile:
Here, clients can update their contact information, communication preferences, birthday, card on file, and manage children accounts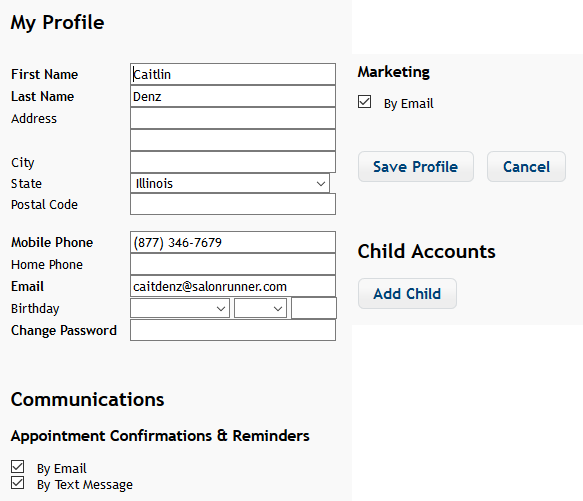
Add Child:
To add a child to their account, they will click "Add Child"
They will only have to enter their First name and Last name if it is different. Their Mobile number and email will be used from the parent's account
* If you have Integrated Card Processing, they will also be able to choose whether or not the child is able to use the Parent's card on file
Services & Retail:
Here clients can review their service and retail purchase history for themselves and any child accounts attached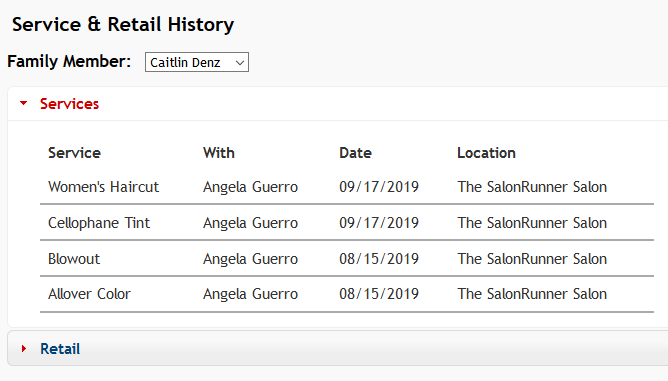
Gift Cards:
Here they will be able to review any Gift Cards they have Purchased or Used (Own)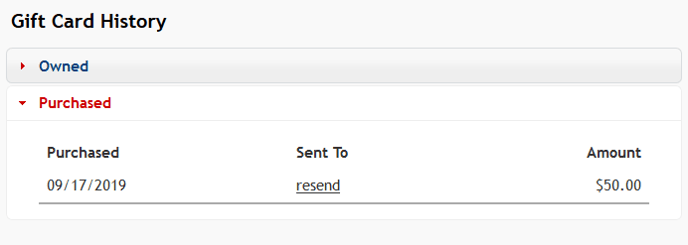
Clients can also email the Gift Card code as a Gift to someone else with a custom message!
1. Click "resend" to start
2. Enter the email you'd like to send the Gift Card code and amount to, and enter a message in the box
3. Click Send Email to finish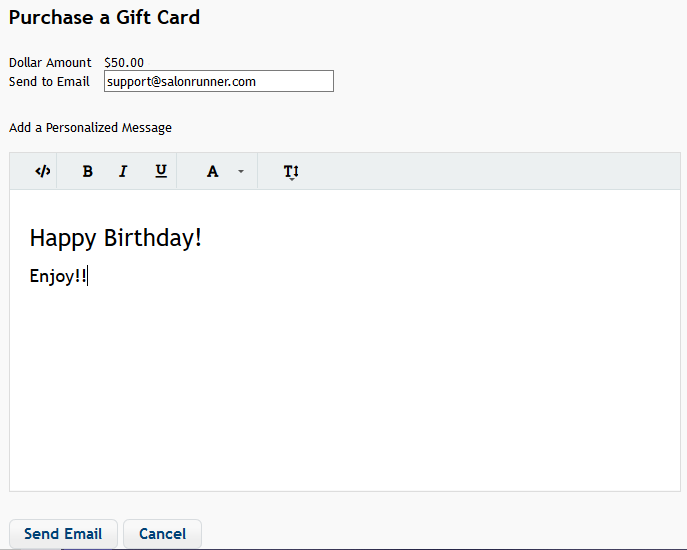
4. You will receive a yellow message at the top if the email was sent successfully
The Subject will be: "New Gift Card for (business name) from (client name)"
The body will contain: "(client name) just bought you a Gift Card!", Gift Card code, amount, custom message, and business address
Packages & Memberships:
Here clients will be able to review any active, expired, and memberships/packages with billing problems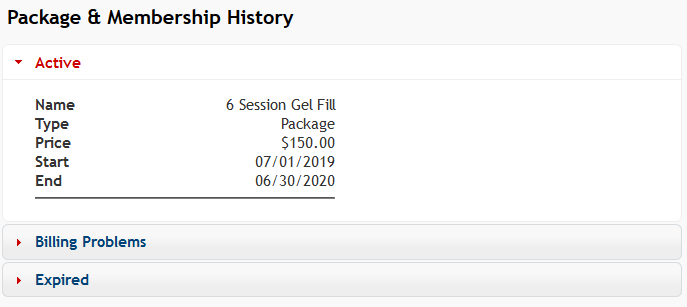
Rewards:
Clients can review all Reward points earned and used including the reason, whether or not they were manually added/removed by an employee, whether or not the point are ready to use, Minimum redemption amount, and the time and date they were earned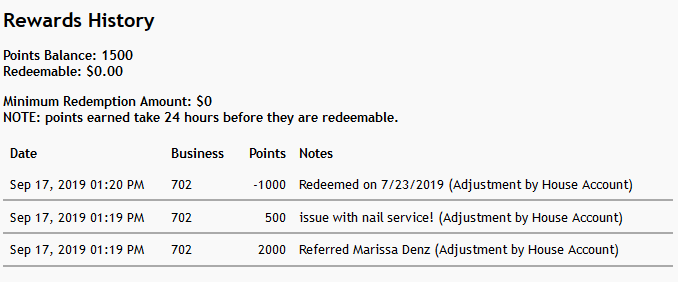
Shopping
Under this tab, the client is able to view and purchase any Packages and/or Memberships, as well as Gift Cards!
Note: Integrated Card Processing is required, and OCS eCommerce will need to be turned on, in order for this tab to be available
Logout
The client will simply use the "Log Out" button at the top to log out