Online Client Scheduling (OCS) allows your clients to schedule their own appointments and view their own records online, 24/7, using a secure personal login name and password.
You can use this feature from an existing business website, Rosy Website Builder, business Facebook page, or business Instagram page.
Update settings exclusive to Classic OCS:
Proceed to: Manage > Online Settings > Classic OCS > Enable Classic OCS?: Yes
To include Online Client Scheduling on your current website use the OCS URL (browser link) found at the top to create a Hyperlink button.
You can alternatively use your OCS Directory URL (browser link) provided below if you have separate Renter accounts attached.
(The OCS Directory is an informational employee page where clients can view your Service Providers and Booth Renters before scheduling. It is recommended you fill out the description and upload a picture for each employee if you are planning on using the Online Scheduling Employee Directory .)
This will help you prevent small gaps when your clients book online. (Ex: Prevent gaps less than 30 minutes will not show appointment options that would create a 15 minute gap before or after that appointment.)
Theme Selection:
This will change the theme of both the Online Client Scheduling page and the Web Page
Select a theme and colors that compliment your website. You’ll be shown a preview of all choices at the bottom of your screen.
1. Choose a Theme from the drop-down box.
2. Choose a type Font
3. Choose a Text Color
4. Choose a Background Color
- If you’d like to swap background and text colors, click Swap Colors
6. Save 
Update settings shared between Classic OCS and RosyPay exclusive Online Booking:
Proceed to: Manage > Online Settings > General Settings

Allow clients to create their own account?
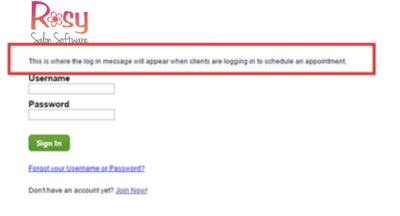
1. If Yes, first time clients will need to create their own account in order to schedule appointments. Clients will click on "Join Now!" below the login fields, if it is their first time scheduling online with you. Clients will need to enter any contact information in BOLD and choose a password. 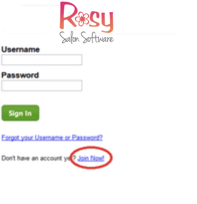
2. If No, you wish to create all client accounts yourself through that client's Client Log.
A client’s online client scheduling password can be set through their Client Log by clicking the Reset button. Their Reset link will be sent to the email address they have on file.
- Access the Client Log of a client
- Locate the Online Client Scheduling (OCS) area on the right side of their Profile
- Enter a simple Username for the client
- Click on the Reset button next to Password
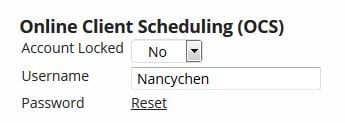
Note: Please make sure the client has a valid email address on file before clicking "Reset" or they will not receive the set/reset password link
5. Client will receive a time sensitive email with a link to reset their password
Hours in advance clients can schedule appointments:
The average is 1 hour but again, it should be whatever best suits your business.
Please choose the order in which services should be scheduled within the Salon/Spa category.
Much of the time it doesn’t matter but depending on your business, there can be practical reasons for choosing a fixed order.
Schedule on the:
If you want to limit your clients to scheduling on the hour (:00) OR on the half hour (:00 and :30), you will set this here. If you have services that are a 15 or 45 duration, we recommend keeping this set to "Any Block"
Max wait time between appointments:
Appointments here refers to services. So, if you want a client's services to be scheduled back-to-back as one WHOLE appointment, you'd set this to "0 (Back to Back)". If you would instead like to offer clients the ability to schedule multiple services within an appointment with possible wait times between them, you'll choose a maximum of hours for wait time, or set to "Any".
Allow client to schedule multiple services within the same service group?
The default option is only one service per group, and it will apply to most businesses. This field is geared mainly toward spa services. A only one service per group answer will prevent clients from scheduling, for instance, a single process color and highlight on the same day.
Secondary services should use same employee as primary?
If set to Yes: As long as the first service chosen requires a secondary service, the client will ONLY be able to schedule the secondary service with that same employee.
Click Save once you are finished with changes to these settings
Service Group Priorities
1. Control the order in which services are booked. No matter which order the client chooses the services, group prioritizing makes sure the order is the way you want them booked. For example color always before the haircut or style, etc.
2. Save
Services
Turn off the services you don’t want shown online. For instance, you won’t want to show procedures that require a consultation or are an add on (extra color).
Some services require a secondary service to complete the process. For instance, if you require a haircut after a color you’ll want to set up your color service listings to require a secondary service and the haircut to be the secondary service so that the customer must book both appointments.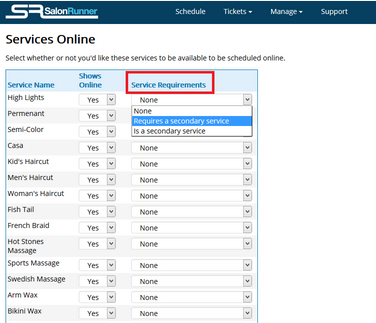
1. Make your selections for each service.
2. Save
Service Providers
Select the employees/service providers that are available for online client scheduling.
When you use the OCS Directory link you will have the ability to add a description and an employee profile picture to be displayed.
*Booth Renters must manage their own show online setting, description, and profile picture in their account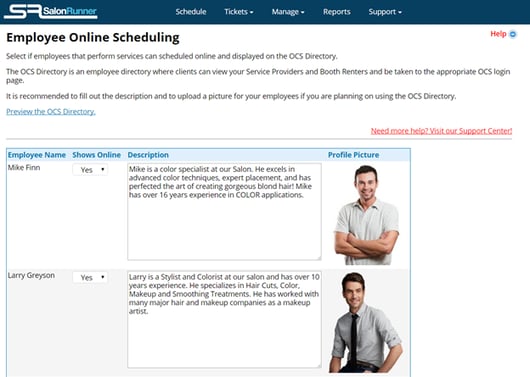
Upload your Logo:
Your logo will appear on all online scheduling pages. The file must be a .PNG, .JPG or .GIF and cannot be larger than 300KB. We recommend .PNG or .GIF, as .JPG files can be too large to work with. To convert a .JPG file to a more manageable file, go to: Converter. For best viewing, the image should have a maximum height of 84 pixels and have a transparent background.
If you do not use a logo, your business name (in plain type) will be used in its place.
1. Current Image: Will be blank until you upload an image.
2. In order to Upload New Image. Click on the browse box to choose a logo file that’s been saved to your computer.
3. In the screen that comes up, find the file you want and click on it.
4. Click Open, and the file will be uploaded.
5. Save
Share on Social Media: is used to announce your online booking to your Facebook and Twitter accounts.
Click on the Facebook or Twitter icons to auto generate a post containing your custom online booking link to your social media pages.
If you would like to see what your clients will see and do from their end, check out: OCS Walk Through