Proceed to: Manage > Basic Settings > Employees 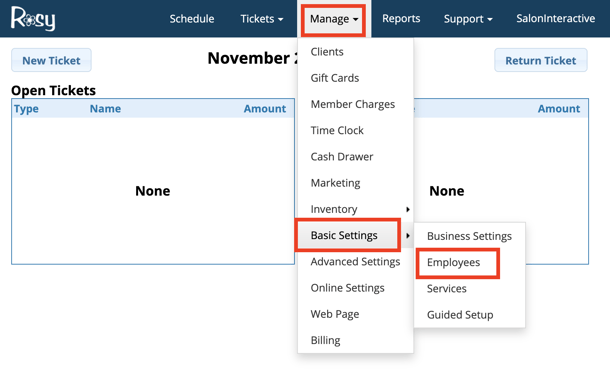
Note: Employees can now be dragged and dropped to create the order they are listed on the schedule. When a new employee is created they will automatically be assigned to the last position and before any terminated employees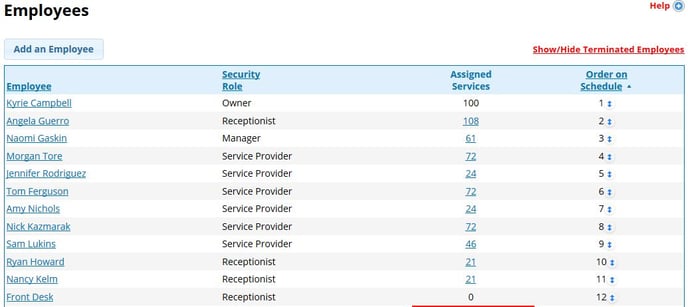
Add a New Employee
![]()
Basics:
Enter name and contact information, including mobile phone number and provider if you want this employee to receive text messages regarding schedule changes![]()
Scheduling Hours:
These are the hours this service provider is available for appointments to be scheduled.
- Selected times must fall within the hours you chose in Business Settings
- Click Save then click Done
Repeat for all employees by clicking Add New Employee
Settings:
· Select “Yes” for employees who Perform Services. Select “No” for others such as a receptionist or back room employee who does not appear on the schedule
· Track Retail Sales: keeps track of this employee’s retail sales for commissions/totals
· Track Employee Tips: Click “Yes” if employee accepts tips
· Uses Time Clock: Click "Yes" if employee will be clocking in and out
· Do not skip the Hire Date
· Termination Date: For instructions on how to Terminate an Employee, click here!
Permissions:
· If this employee will be using the software, enter a unique username and password. (You may leave this section blank if the employee will not be logging into the software as his or herself)
· Select the drop-down box to choose their Role. This determines what areas of the software the employee has access to.
For more information, see the "Employee Security Roles: Overview" article
· Enabling individual permissions will allow you to manage what you want each employee to have access to specifically
For more information, see the "Employee Permissions: Overview" article 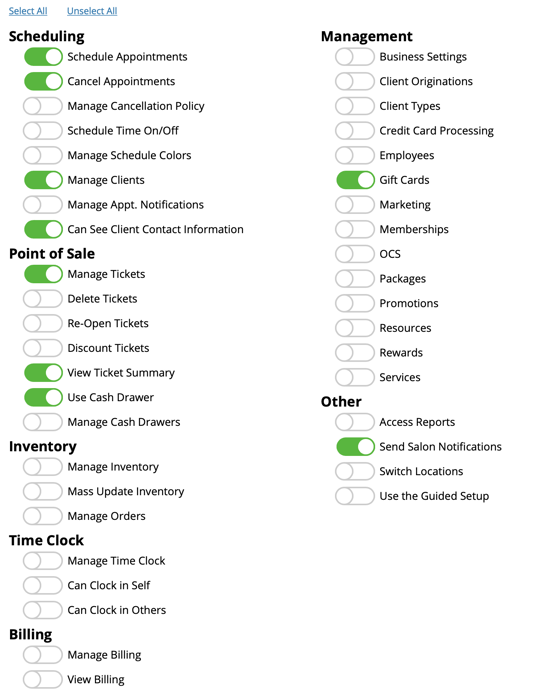

Commissions:
Set a flat commission percentage for Retail and/or Services OR assign a Commission Scale in your Advanced Settings 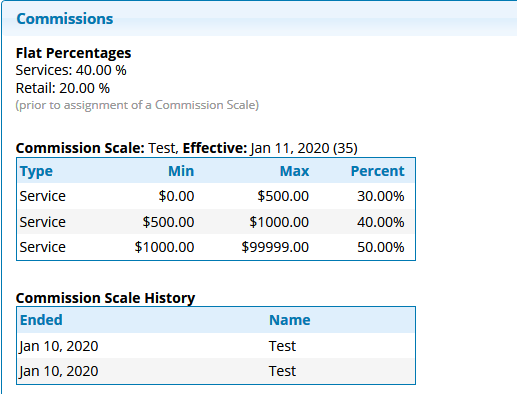

Notes:
There is now an area within each employee profile to add arbitrary notes about that employee (i.e License Expiration Date, etc)
· IMPORTANT: Once you add an employee note, it cannot be deleted or edited!
Image Upload:
This section is for the image to display on your OCS Directory page. You can upload, edit, or remove the employee's image here. To edit or delete an existing image, you must first select the image shown.

Daily Goals:
You can set goals for your employee sales and scheduling in this section that will be used on the Service Provider Tracking Reports
Assigning Services:
1. Start by clicking the Assign Services button in the top, right corner 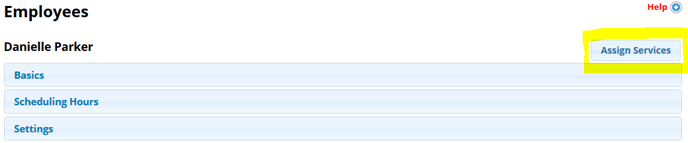
2. Click on the Available tab
3. Check all the services this employee will perform. You can also click Select All at the top to select all available services, or click Select All next to a service group name to assign all service from a specific Service Group 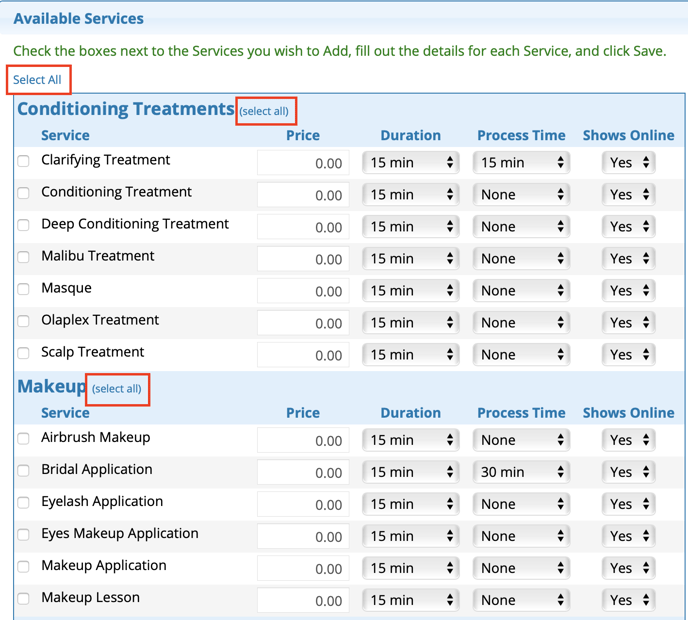
4. Enter the Price you charge for this employee to perform each service
5. Enter Duration and Process Time for each service. Duration is the amount of time needed to perform the service
Please Note: For a service with a process time, if you want the employee to be free to perform another service during the process time, you must divide the total time between Duration and Process. Only Duration time will be booked.
Example: A service that takes 90 minutes
total has a process time of 45 minutes. You will enter 45 minutes in Duration and 45 minutes in Process to add up to the total 90 minutes. This service will be booked on the schedule as 45 minutes to allow the employee to schedule another service during the 45 minute process time
(OR you can set the entire 90 minutes in Duration and leave Processing Time set to "None", so that the entire time will be blocked out on the schedule)
6. Shows Online allows you to enable/disable specific services by service providers for your online schedule
Note: If the Shows Online is grayed out, this is because your settings under Online Settings > Services have Show Online: No preventing that service from being shown online for any service provider.
7. Click Save
How to use the Copy Tab:
When assigning the same services to more than one employee, you can save time by copying some or all of the information from another employee’s record
1. Click on the Copy tab at the bottom of the page
2. Using the drop-down box, select the employee you want to copy the services from
3. Choose one of three options:
- Copy only the services which haven’t already been checked for the employee record you’re working on
- Copy the above plus update the services which have already been assigned
- Remove all existing services from this record and replace them with the services from the selected employee
4. Click Submit (If you’re sure you want to copy the services, select "Yes" in the pop-up)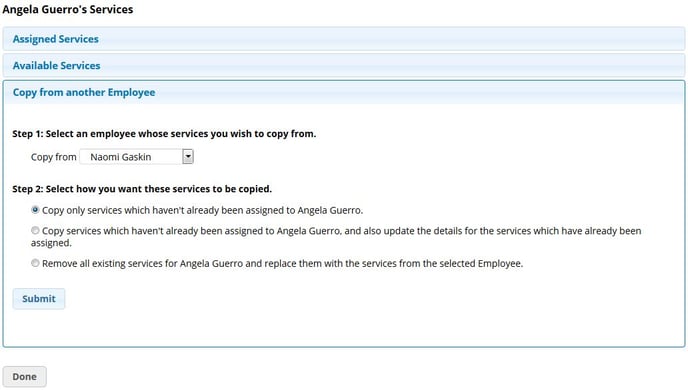
Notes:
· If you charge a different price for this employee to perform a service, you may change the Price field
· If the Duration time is longer or shorter for this employee to perform a service, you may change it
· Click Save after any changes are made
· When all of your service providers have been assigned services, click Done to go back to the main employees page