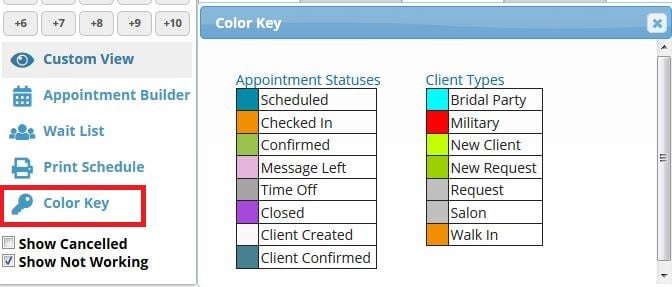
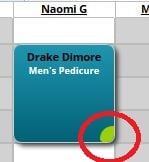
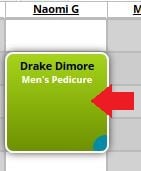
Client Types are used to track client source and/or retention. They are color-coded on your schedule screen as the bottom, right corner of the appointment box OR as the color of the appointment box itself (depending on your Schedule Colors setting) .
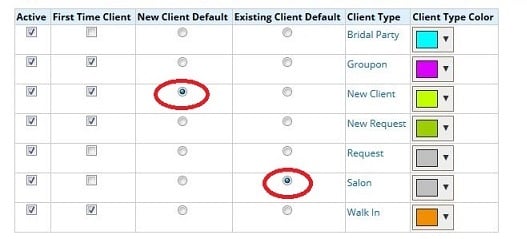
There are 4 Client Types that are pre-set in the system:
· New Request: A NEW Client who has requested a specific Service Provider
· Request: An EXISTING Client who has requested a specific Service Provider
· Salon: An EXISTING Client who did not request a specific Service Provider
· Walk-In: A Client who has not booked in advance before coming in
Custom Client Types can also be created to track other important data such as Groupon customers, Senior Discounts, Bridal Parties, etc!
Client Types also are shown when Printing the Schedule:
(Schedule > Employee Schedule > Choose Date > Choose your desired filters > Run Report)
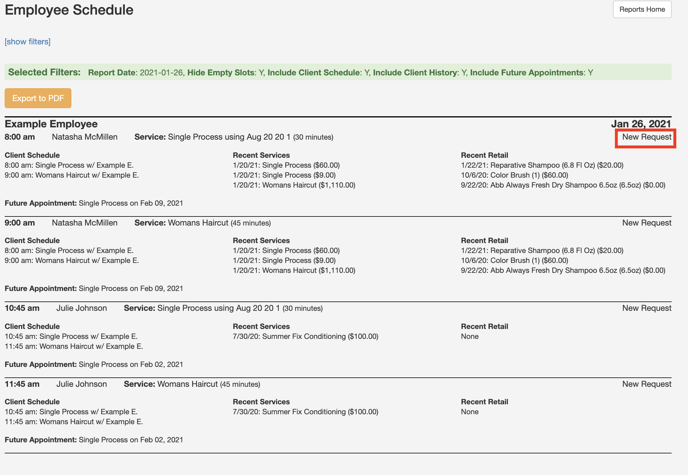
For more on the Employee Schedule function, click here
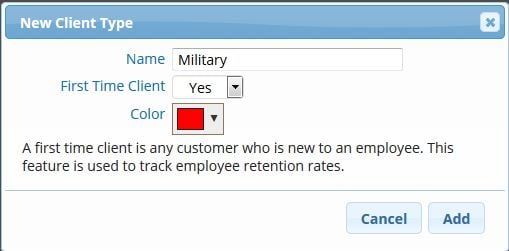
How to Add a Client Type:
Proceed to: Manage > Advanced Settings > Manage (located under Client Types)
1. Click on New Client Type
2. Enter client type name and specify whether it can pertain to a first time client or not.
- Note: All first-time clients will automatically default to the New Request category unless you change the "New Client Default" type to another status in the Advanced Client Type Settings
3. Choose the color for the client type. (Remember: They are color-coded on your schedule screen)
4. Click Add
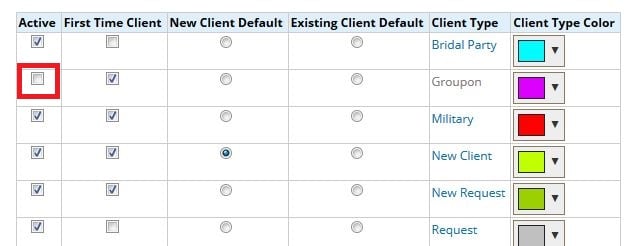
How to Remove a Client Type:
Proceed to: Manage > Advanced Settings > Manage (located under Client Types)
Client Types cannot be deleted, but they can be inactivated so that they no longer show up as an option upon scheduling a client
1. Uncheck the Active field next to the client type you'd like to remove.
You will be able to go back and re-activate this in the future, if need be.
Changing a Client Type on a Sales Ticket:
Proceed to: Tickets > Ticket List
1. From the Open Tickets list, click on the client’s name
2. Click on the Client Type next to the client’s name
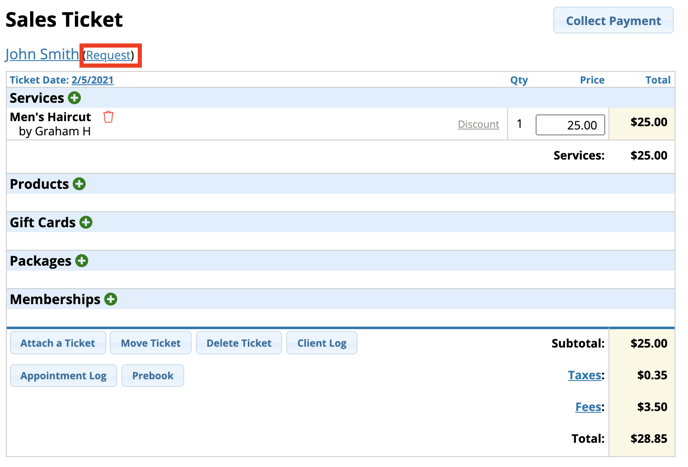
3. Choose a new Client Type from the drop-down menu
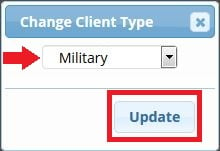
4. Click Update
If you are ever confused on what the color of an Appointment/corner of an Appointment means, you can use the Color Key located on the left side of your Schedule