All appointments are color coded to show their status and client type at a glance.
A key to the color codes is available by clicking the Color Key button on the left of the Schedule screen.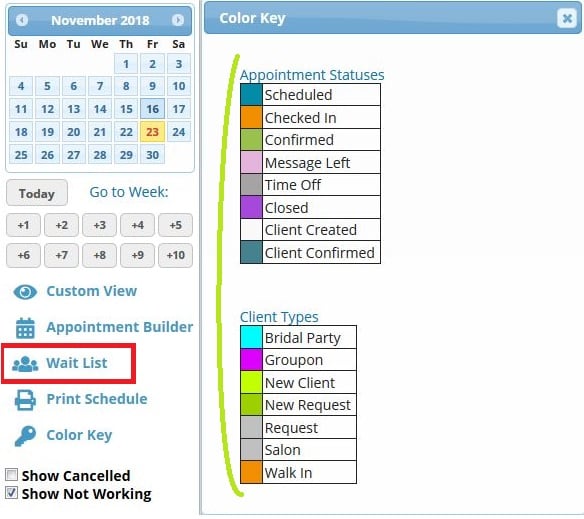
The color codes are defaulted colors for both appointment status and client type, but may be changed to suit your own preference.
To change any color for either category:
Proceed to: Manage > Advanced Settings > Manage (located under Schedule Colors)
1. Click on the color next to the status or client type you want to change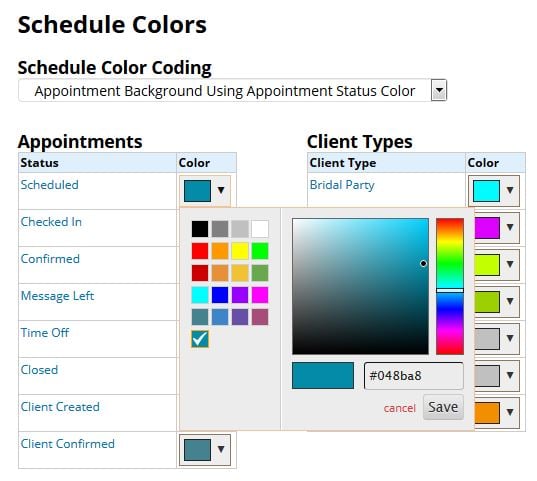
2. Select one of the pre-set color choices, and/or use the contrast adjuster provided to make the color lighter or darker
4. Click Save
Furthermore, you can choose what determines the background color of your appointments (Appointment Status OR Client Type)
Within the Schedule Colors settings, use the "Schedule Color Coding" drop-down provided
(Manage > Advanced Settings > Manage [located under Schedule Colors])
Appointment Background Using Appointment Status Color (default): Will set the Appointment Status as the background color of the appointments, and put the Client Type color at the bottom, right corner of the appointments
Appointment Background Using Client Type Color: Will set the Client Type as the background color of the appointments, and put the Appointment Status color at the bottom, right corner of the appointments
Once the color coding is changed, settings will automatically save
If you need to add or inactivate any Client Types, proceed to the Adding/Editing Client Types article!
English