There are lots of new and exciting features used on the New Online Booking platform. Below, we will go over some new settings you will want to verify before sharing with your clients.
Navigate to: Manage > Online Settings > Online Booking New
At the top of this screen, you will see that there is a new Online Scheduling URL and About Us page URL that you can use to share with clients in emails, on social media, and integrated with your website.
Enable online scheduling: When you are ready for this page to be accessible to clients, you will toggle on.
Require mailing address on user signup: If you would like to make the address a required field for clients who sign up, you can toggle this on.
Show renters (BoothRenter accounts only): If the owner of attached booth renters would like to display these service providers on the OLB About Us page, this will allow clients to be seamlessly redirected to their individual booking pages. If turned off, it will only show providers listed as employees of the business.
Maximum Scheduling Window (days): this allows you to restrict how far in advance clients can schedule appointments online.
Business Display Name: this optional setting allows you to display an alternate business name on the About Us page.
Tagline or slogan: this optional text is shown on the "About Us" page under the business name.
Important Notes: this message will be displayed to your clients on the checkout screen. You can use it to share additional information, policies, links, etc.
Business Hours: these hours are for display only on the About Us page. Changing these settings will not impact any of the scheduling hours for the business or employees.
Cancellation Policy: The New Online Booking checkout page will remind clients of the policy and will require clients acknowledge this prior to scheduling their appointment. Changing the message on this page will automatically update the message under Advanced Settings > Cancellation Policy: Configure how Clients can cancel appointments, and vice versa. 
About Us: This text box allows you to add a message to clients visiting your page. It is intended to be used to share business policies, specialties, background, etc. with existing and potential customers.
Service Pricing, Duration, and Descriptions: 
Now, your clients are able to see pricing and service descriptions before scheduling their appointment online. Navigate to Manage > Basic Settings > Services to reference these settings.
If a client is scheduling by selecting their service first, it will display the starting price and duration "+" so it is important that your default prices and timings are updated accurately.
Your Service Descriptions for each service can also be added so they are displayed on the online booking platform.
Service Instructions are still used to provide your clients instructions and are only shown on confirmation and itinerary emails.
If a client opts to schedule by selecting their service provider first, it will automatically update to show the client the timing and pricing unique to that service provider. Because of this, you will also want to check your employee's individual settings by navigating to Manage > Basic Settings > Employees > select an employee name > Assigned Services.

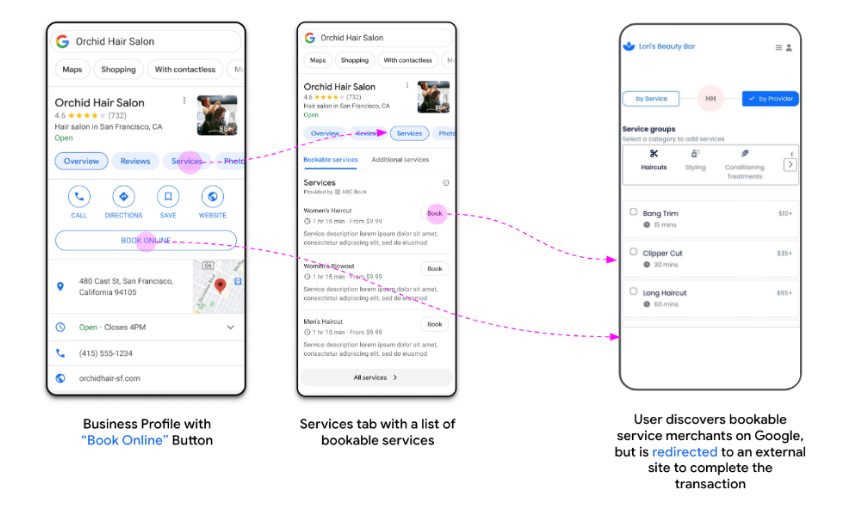
Google Business Page: Google's scheduling tool, Reserve With Google (aka Appointment Redirect), is available for use with the new Online Booking platform. All you need to do to allow clients to book with your business through your Google business profile is navigate to Manage > Basic Settings > Business Settings > Settings > Other Settings > Reserve With Google: Yes > Save. It can take Google up to 24 hours to recognize this setting was turned on or off in Rosy.

This New Online Booking platform is currently exclusive to RosyPay users. If you are a current RosyPay user and are interested in piloting this new feature, please reach out to our support team at support@rosysalonsoftware.com
If you have not yet gotten started with embedded payments and are interested in this and the many other benefits of RosyPay, please click here!
