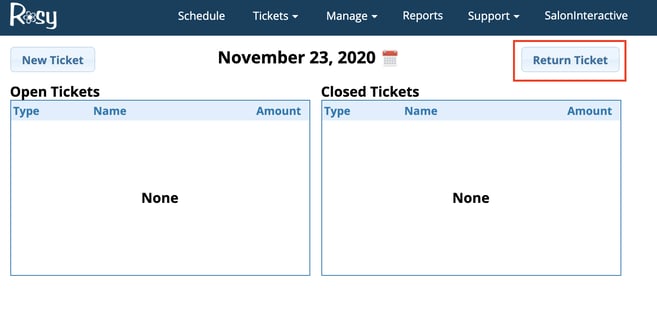
1. Proceed to: Tickets > Ticket List
2. Click the Return Ticket Button
3. Search & select the client’s name from the search bar pop-up.
- Disregard the “Item Not Tracked” box unless you are willing to give refunds for items you do not carry.
4. Once the client is selected, click Continue
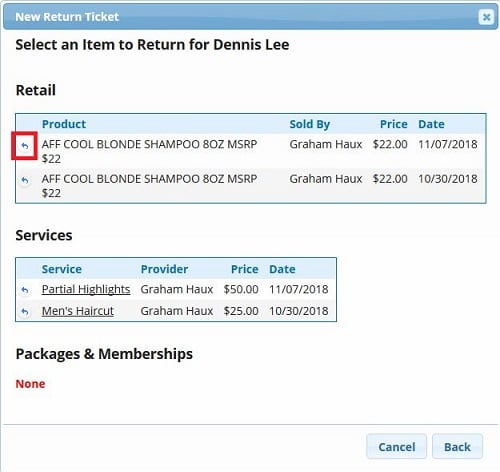
5. In the client's history, locate the item being returned, and click on the return arrow icon to the left of it
Note: If you need to return more than one item, that is done by using the "Return More" button found on the return ticket itself
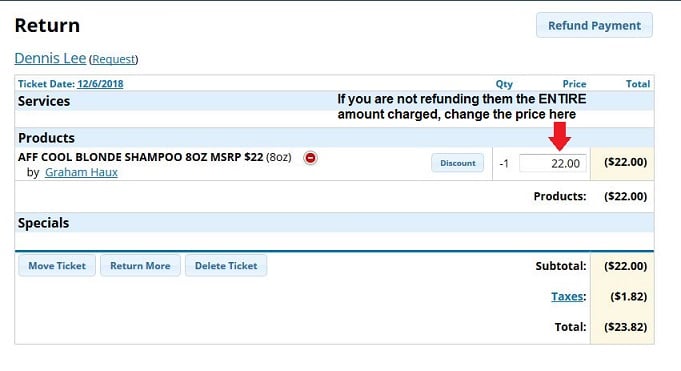
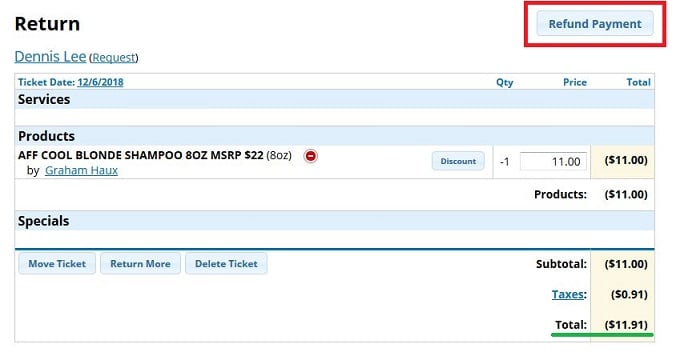
6. Review the amount you will be refunding the client. If you are trying to refund PARTIAL payment, you'll need to change the price of the item(s) on the Return Ticket
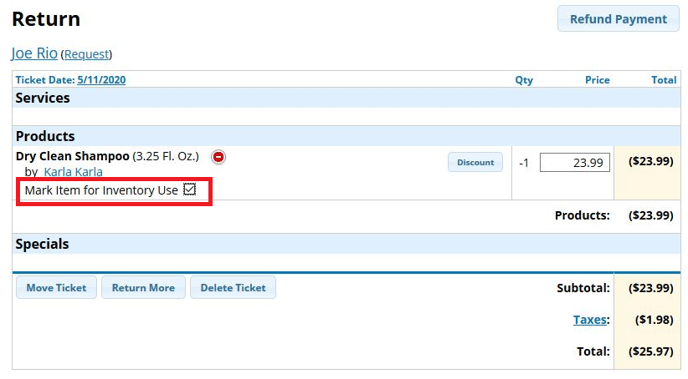
7. Mark Item for Inventory Use if you do not want to return the returned item back onto the shelf for repurchase.
8. Review the Total you'll be refunding once more at the bottom of the Return Ticket, then click Refund Payment
Note: If you need to take away any discounts that may have been applied to the original sale ticket, you'll simply click the Discount button, replace the discount amount with "0", then click Discount again
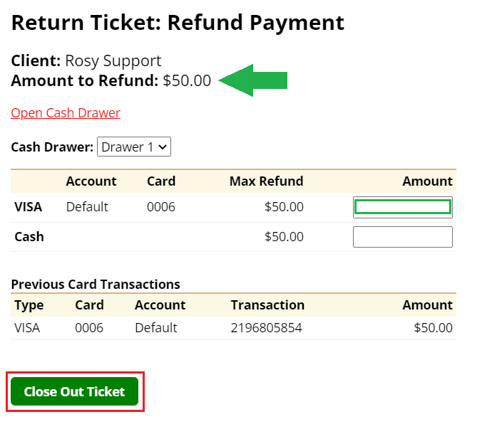
8. Enter the amount due next to the method you'll be using to return their payment, then click Finish
If you were returning any retail items, the On Hand amount in your Inventory will be automatically updated
Note: At this time, there is no check box or button to declare the item as "Used" or "Damaged". If you do not want the product returned to inventory (do not want the On Hand amount adjusted), after processing the refund, use the Inventory Use function. It will take the item count(s) back out of inventory.
Check out our "Exchange Transaction" article!