When a client arrives to be serviced, you'll want to check them in.
1. When the client arrives, click on the client's appointment on the Schedule
2. Click Check In
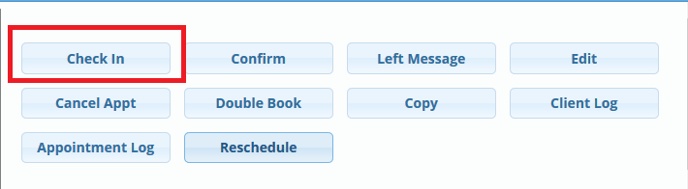
3. Any notes in the Client Log that were set to pop-up at check-in will show on the left side of the appointment
4. A ticket will be created in the Open Tickets column on the Tickets screen for check-out
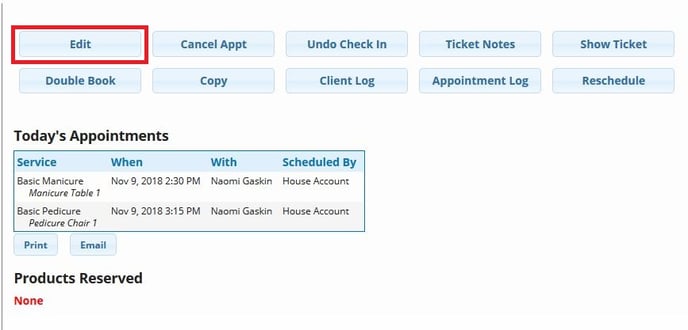
Editing an Appointment:
You have the ability to edit each service within an appointment, even after it has been checked in!
1. Click on the appointment on the Schedule
2. Click Edit
3. Choose the Service you would like to change it to OR simply change the amount of time it will take in the drop-down
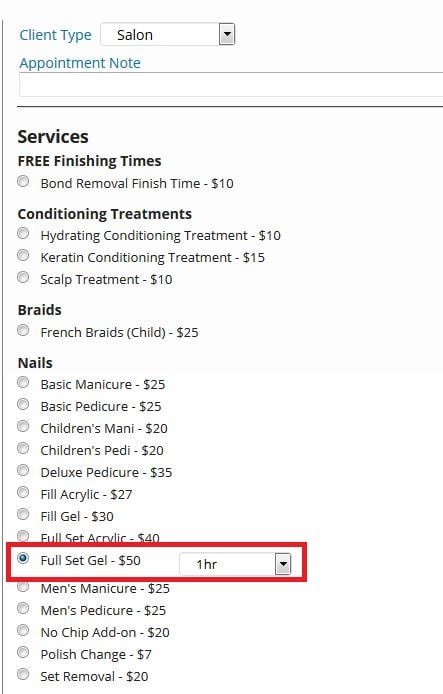
Note: You can only edit one service at a time within an Appointment
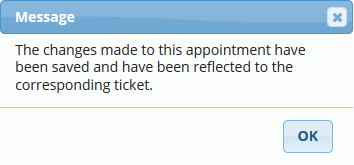
4. Click Save Changes at the bottom
5. If the appointment had already been checked in, you will see this message
Also check out Curbside / Self Check In