This feature allows you to attach two or more client sales tickets so that the overall total payment can be collected by one client. This is great for Bridal Parties, Parent-Child(ren) appointments, etc...
IMPORTANT: Please be sure the ticket(s) you are going to attach to another ticket are all completely setup properly BEFORE attaching!
1. Proceed to the ticket of the client who will be paying (Tickets > Ticket List > Click on their name in the open tickets column)
- If the client has an appointment on the Schedule, you can also access their ticket by clicking on their appointment, then clicking "Show Ticket"
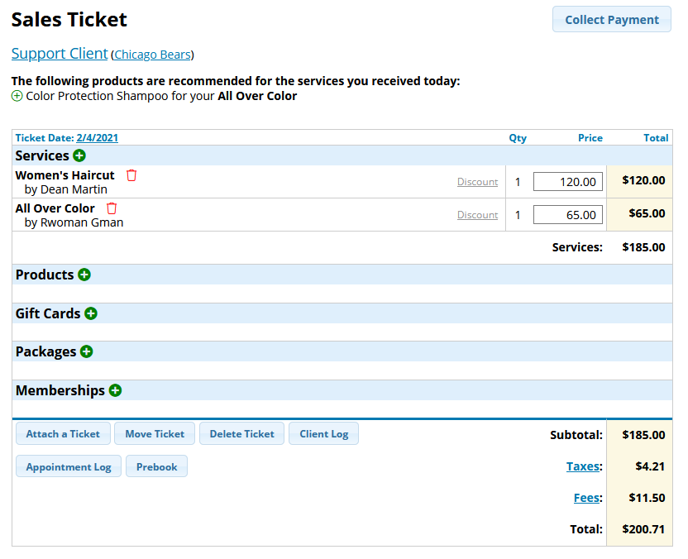
2. Click Attach a Ticket at the bottom
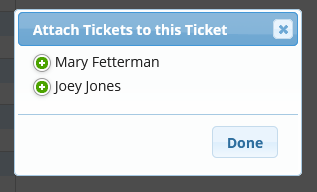
4. In the pop-up that appears, click the green plus button next to the name of the client(s) being attached, then click Done. They will disappear as you attach them.
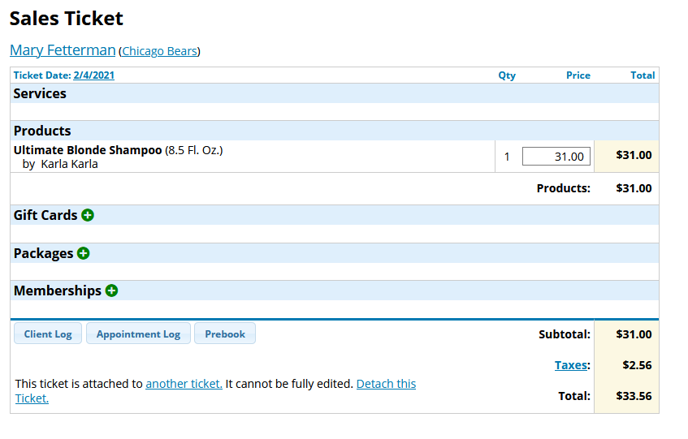
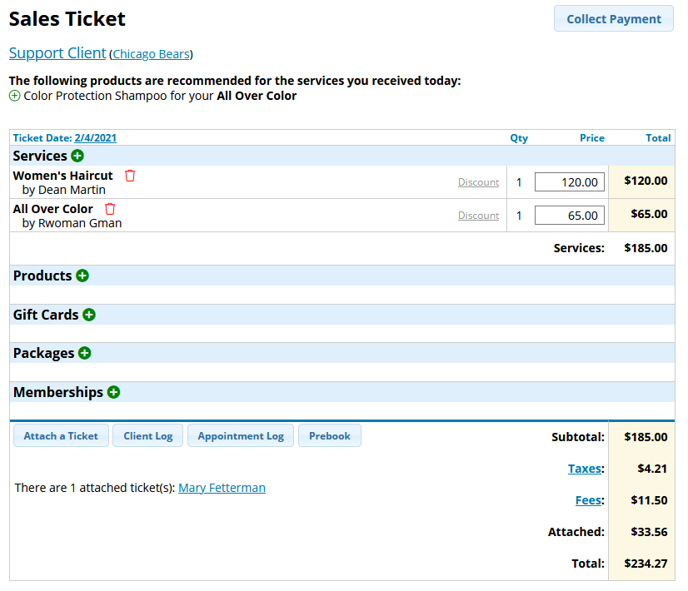
5. The screen will refresh to show the original sales ticket with the total from the other attached ticket(s) added at the bottom. It will not show the service(s) or product(s) of the attached tickets here.
7. Click Collect Payment, Finish, and close the ticket per usual (See "Checkout: Collecting a Payment")
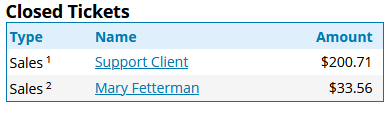
Once payment is collected and the main ticket is closed, it and all attached tickets will move to the "Closed Tickets" column on the right.
Note: On the ticket screen, attached tickets will be marked "1" and "2"
(1) Has Tickets attached to it; Is the main/paying ticket
(2) Attached to another ticket; Paid for on the ticket marked "1"
Detaching Tickets:
Tickets can only be detached before they are closed
1. Click on the ticket that is attached to the other (2)
2. Click Detach this Ticket