These messages are automated. You set it up once, and then the software takes over.
To start, head to Manage > Advanced Settings > Manage (under Email & Text Communications) 
Email Confirmations: 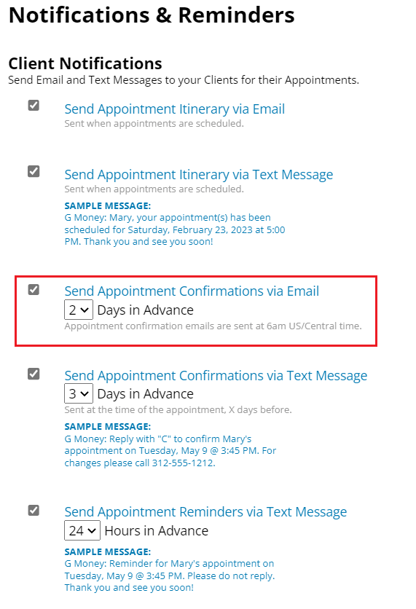
Appointment confirmation emails are sent at 6 AM US/Central time however many days in advance they are set to
Email Itinerary: 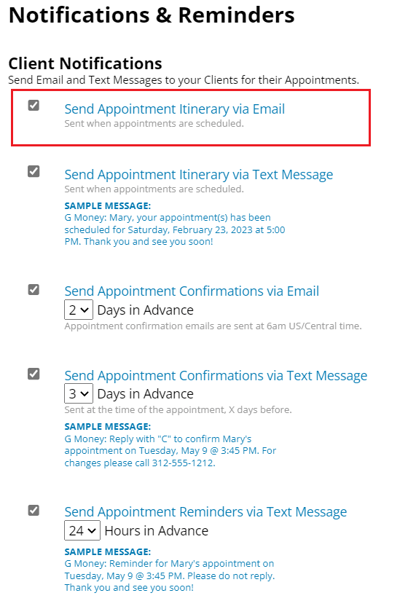
Email itineraries will be received by clients 15-20 minutes after their appointment is initially scheduled
Text Confirmations:  Text confirmations are sent to the client at the same time as their appointment however many days in advance you choose.
Confirmation text messages and Itinerary text messages are only available when the Client Connect Bundle is activated. Click here to learn how to activate the Client Connect Bundle
Text Itinerary Message:

Text Itinerary messages are sent after an appointment has been scheduled. However, if the appointment is scheduled within the time frame of a confirmation text being sent out a text itinerary will not also be sent.
Text Reminders: 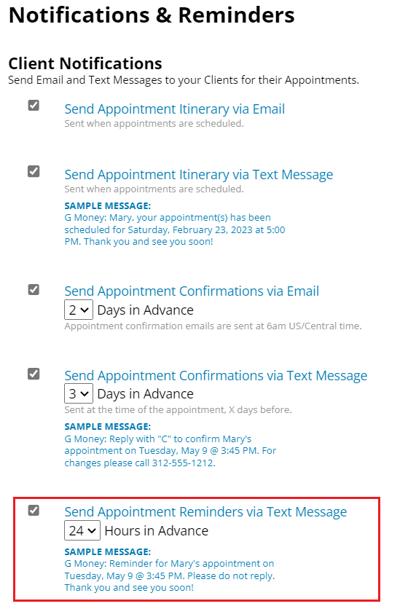
Text reminders are sent to the client however many hours before their appointment you choose (we highly recommend you do not set it for anything over 3 hours, in the case that the client's appointment is at an early time)
Setting up Employee Notifications:
1. Check all 4 boxes at the bottom of the Email & Text Communications page, then click Save 
2. You'll receive the pop-up below.... Click "Yes" 
3. Proceed to: Manage > Advanced Settings > Email & Text Communications > Employee Text Message Settings
4. Update the notification preferences for each of your employees and click Save. 
Note: This can also be updated under Basic Settings > Employees > select the employee name > Basics
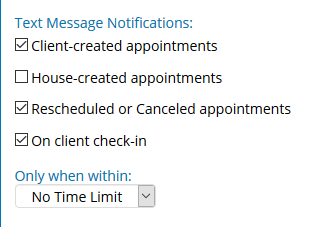
We typically recommend "Only when within" is set to No Time Limit.
If you choose a Only when within: 3 Hours, for example, the employee will only receive these text notifications for schedule changes made within that time frame